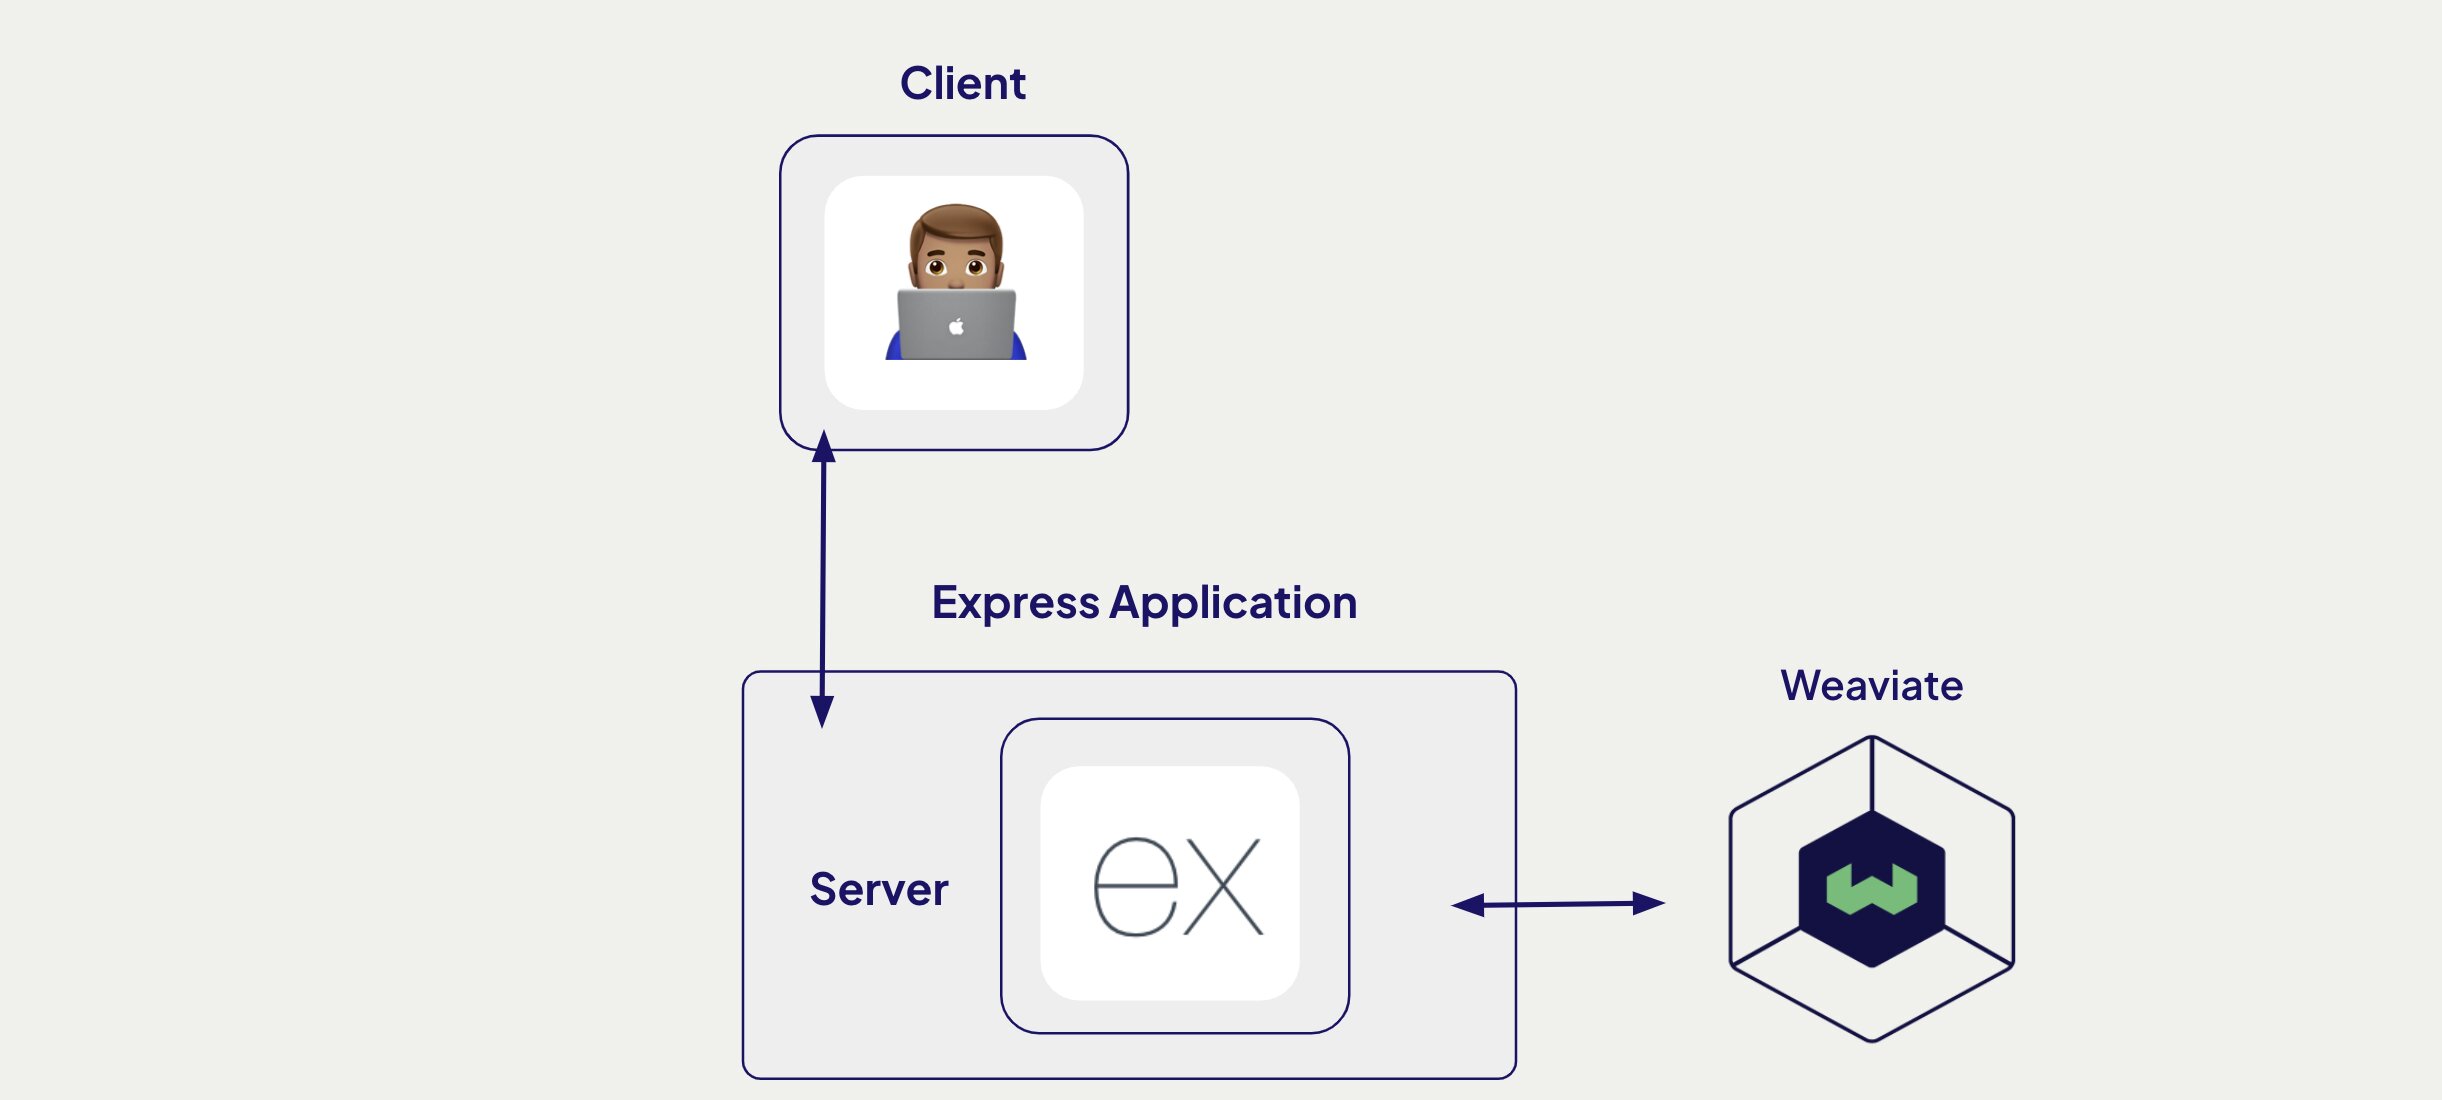
Using Backend Web frameworks
This approach involves having two separate tools. One to build your server application; ideally a backend framework and another to build your client application. For this example, we will be using Express.js to build a backend server, and Thunder Client to act as a client and make API calls to our backend server.

Building a server
The server will have a single route that accepts a searchTerm as a query parameter.
1. Initialize a Node.js application
We will use Express to build our server, in a new directory, run the following command to initialize a new project with Node.js
npm init
2. Install project dependencies
With our project initialized, install dotenv to manage environment variables, express to build our server and the weaviate-client to manage communication with our Weaviate database.
npm install express dotenv weaviate-client
3. Setup your Weaviate database
We'll start by creating a free sandbox account on Weaviate Cloud. Follow this guide if you have trouble setting up a sandbox project.
You will need your Weaviate cluster URL and API key. If you don't already have one, create a new Cohere API key, we use Cohere as our embedding model. When done, add all three to your .env file.
COHERE_API_KEY=
WEAVIATE_URL=
WEAVIATE_API_KEY=
3.5 Add data to Weaviate
Follow our recipe on loading data into Weaviate to import data to your Weaviate database.
4. Connecting to Weaviate
In config/weaviate.js, paste the following code.
import weaviate from 'weaviate-client'
import 'dotenv/config';

export const connectToDB = async () => {
  try {
    const client = await weaviate.connectToWeaviateCloud(process.env.WEAVIATE_URL,{
          authCredentials: new weaviate.ApiKey(process.env.WEAVIATE_API_KEY),
          headers: {
           'X-Cohere-Api-Key': process.env.COHERE_API_KEY || '',
         }
        }
      )
      console.log(`We are connected! ${await client.isReady()}`);
      return client
  } catch (error) {
    console.error(`Error: ${error.message}`);
    process.exit(1);
  }
};
The code above helps us create a connection to our Weaviate instance hosted on Weaviate Cloud.
5. Create a Search route
In your project root, create a file called app.js and paste the following code in it.
import express from 'express';
import { connectToDB } from './config/weaviate.js';

const app = express();
const port = 3005

const client = await connectToDB();

app.get('/', async function(req, res, next) {
    var searchTerm = req.query.searchTerm;

    const wikipedia = client.collections.get("Wikipedia")

    try {
        const response = await wikipedia.query.nearText(searchTerm, {
            limit: 3
        })

        res.send(response.objects)
      } catch (error) {
        console.error(`Error: ${error.message}`);
      }
  })

app.listen(port, () => {
  console.log(`App listening on port ${port}`)
})
With this we can run searches on the /search route. We use nearText() to run our semantic search.
6. Run your server
In your terminal run the following command to start your server.
node app.js
Your server should be running on localhost:3005.
Building a client Application
With our server built, we can now make a call from a client application. We'll create a basic client application with HTML and JavaScript.
Alternatively, in Thunder Client, you can make a call to http://localhost:3005/search?searchTerm=countries in asia to query your server.
1. Create a client application
In your root folder, create a file called index.html and paste the following code in it.
<!DOCTYPE html>
<html>
<head>
<title>Weaviate Search Client</title>
<style>
.container {
max-width: 800px;
margin: 20px auto;
padding: 20px;
font-family: Arial, sans-serif;
}
.card {
border: 1px solid #ddd;
padding: 15px;
margin: 10px 0;
border-radius: 4px;
}
button {
padding: 10px 20px;
background-color: #17bf36;
color: white;
border: none;
border-radius: 4px;
cursor: pointer;
}
#loading {
display: none;
color: #666;
}
.error {
color: red;
margin: 10px 0;
}
</style>
</head>
<body>
<div class="container">
<h1>Semantic Search Results</h1>
<button onclick="fetchData()">Search</button>
<div id="loading">Loading...</div>
<div id="error" class="error"></div>
<div id="results"></div>
</div>
<script>
async function fetchData() {
const resultsDiv = document.getElementById('results');
const loadingDiv = document.getElementById('loading');
const errorDiv = document.getElementById('error');
loadingDiv.style.display = 'block';
errorDiv.textContent = '';
resultsDiv.innerHTML = '';
try {
const response = await fetch('http://localhost:3005/search?searchTerm=countries in asia');
if (!response.ok) {
throw new Error(`HTTP error! status: ${response.status}`);
}
const data = await response.json();
console.log(data)
data.slice(0, 10).forEach(post => {
const card = document.createElement('div');
card.className = 'card';
card.innerHTML = `
`;
resultsDiv.appendChild(card);
});
} catch (error) {
errorDiv.textContent = `Error: ${error.message}`;
} finally {
loadingDiv.style.display = 'none';
}
}
</script>
</body>
</html>
2. Run your client application
In your root folder, run the following in your terminal
npx http-server
This client application makes a call to the express server you built, displaying results.
