
Import tool
The Weaviate Cloud (WCD) Import tool allows you to easily upload data from a CSV file into a new Weaviate collection. The tool guides you through selecting your cluster, configuring the collection, mapping CSV columns to Weaviate properties, and then automatically imports the data.
For this guide, we will use the following import.csv file:
id,product_name,price,description
1,"Laptop",1200.00,"High-performance laptop with 16GB RAM and 512GB SSD."
2,"Mouse",25.00,"Wireless optical mouse with ergonomic design."
3,"Keyboard",75.00,"Mechanical keyboard with RGB backlighting."
Step 1: Start the import process
The Import tool is accessible from the Weaviate Cloud console.
- To begin, select the
Importtool from the left sidebar (1). - The
Clusterspanel lists the clusters that are available. Select a cluster from the list where you want to import your data (2). - Click on the
Browse CSV filesbutton (3) to select the CSV file you want to import.
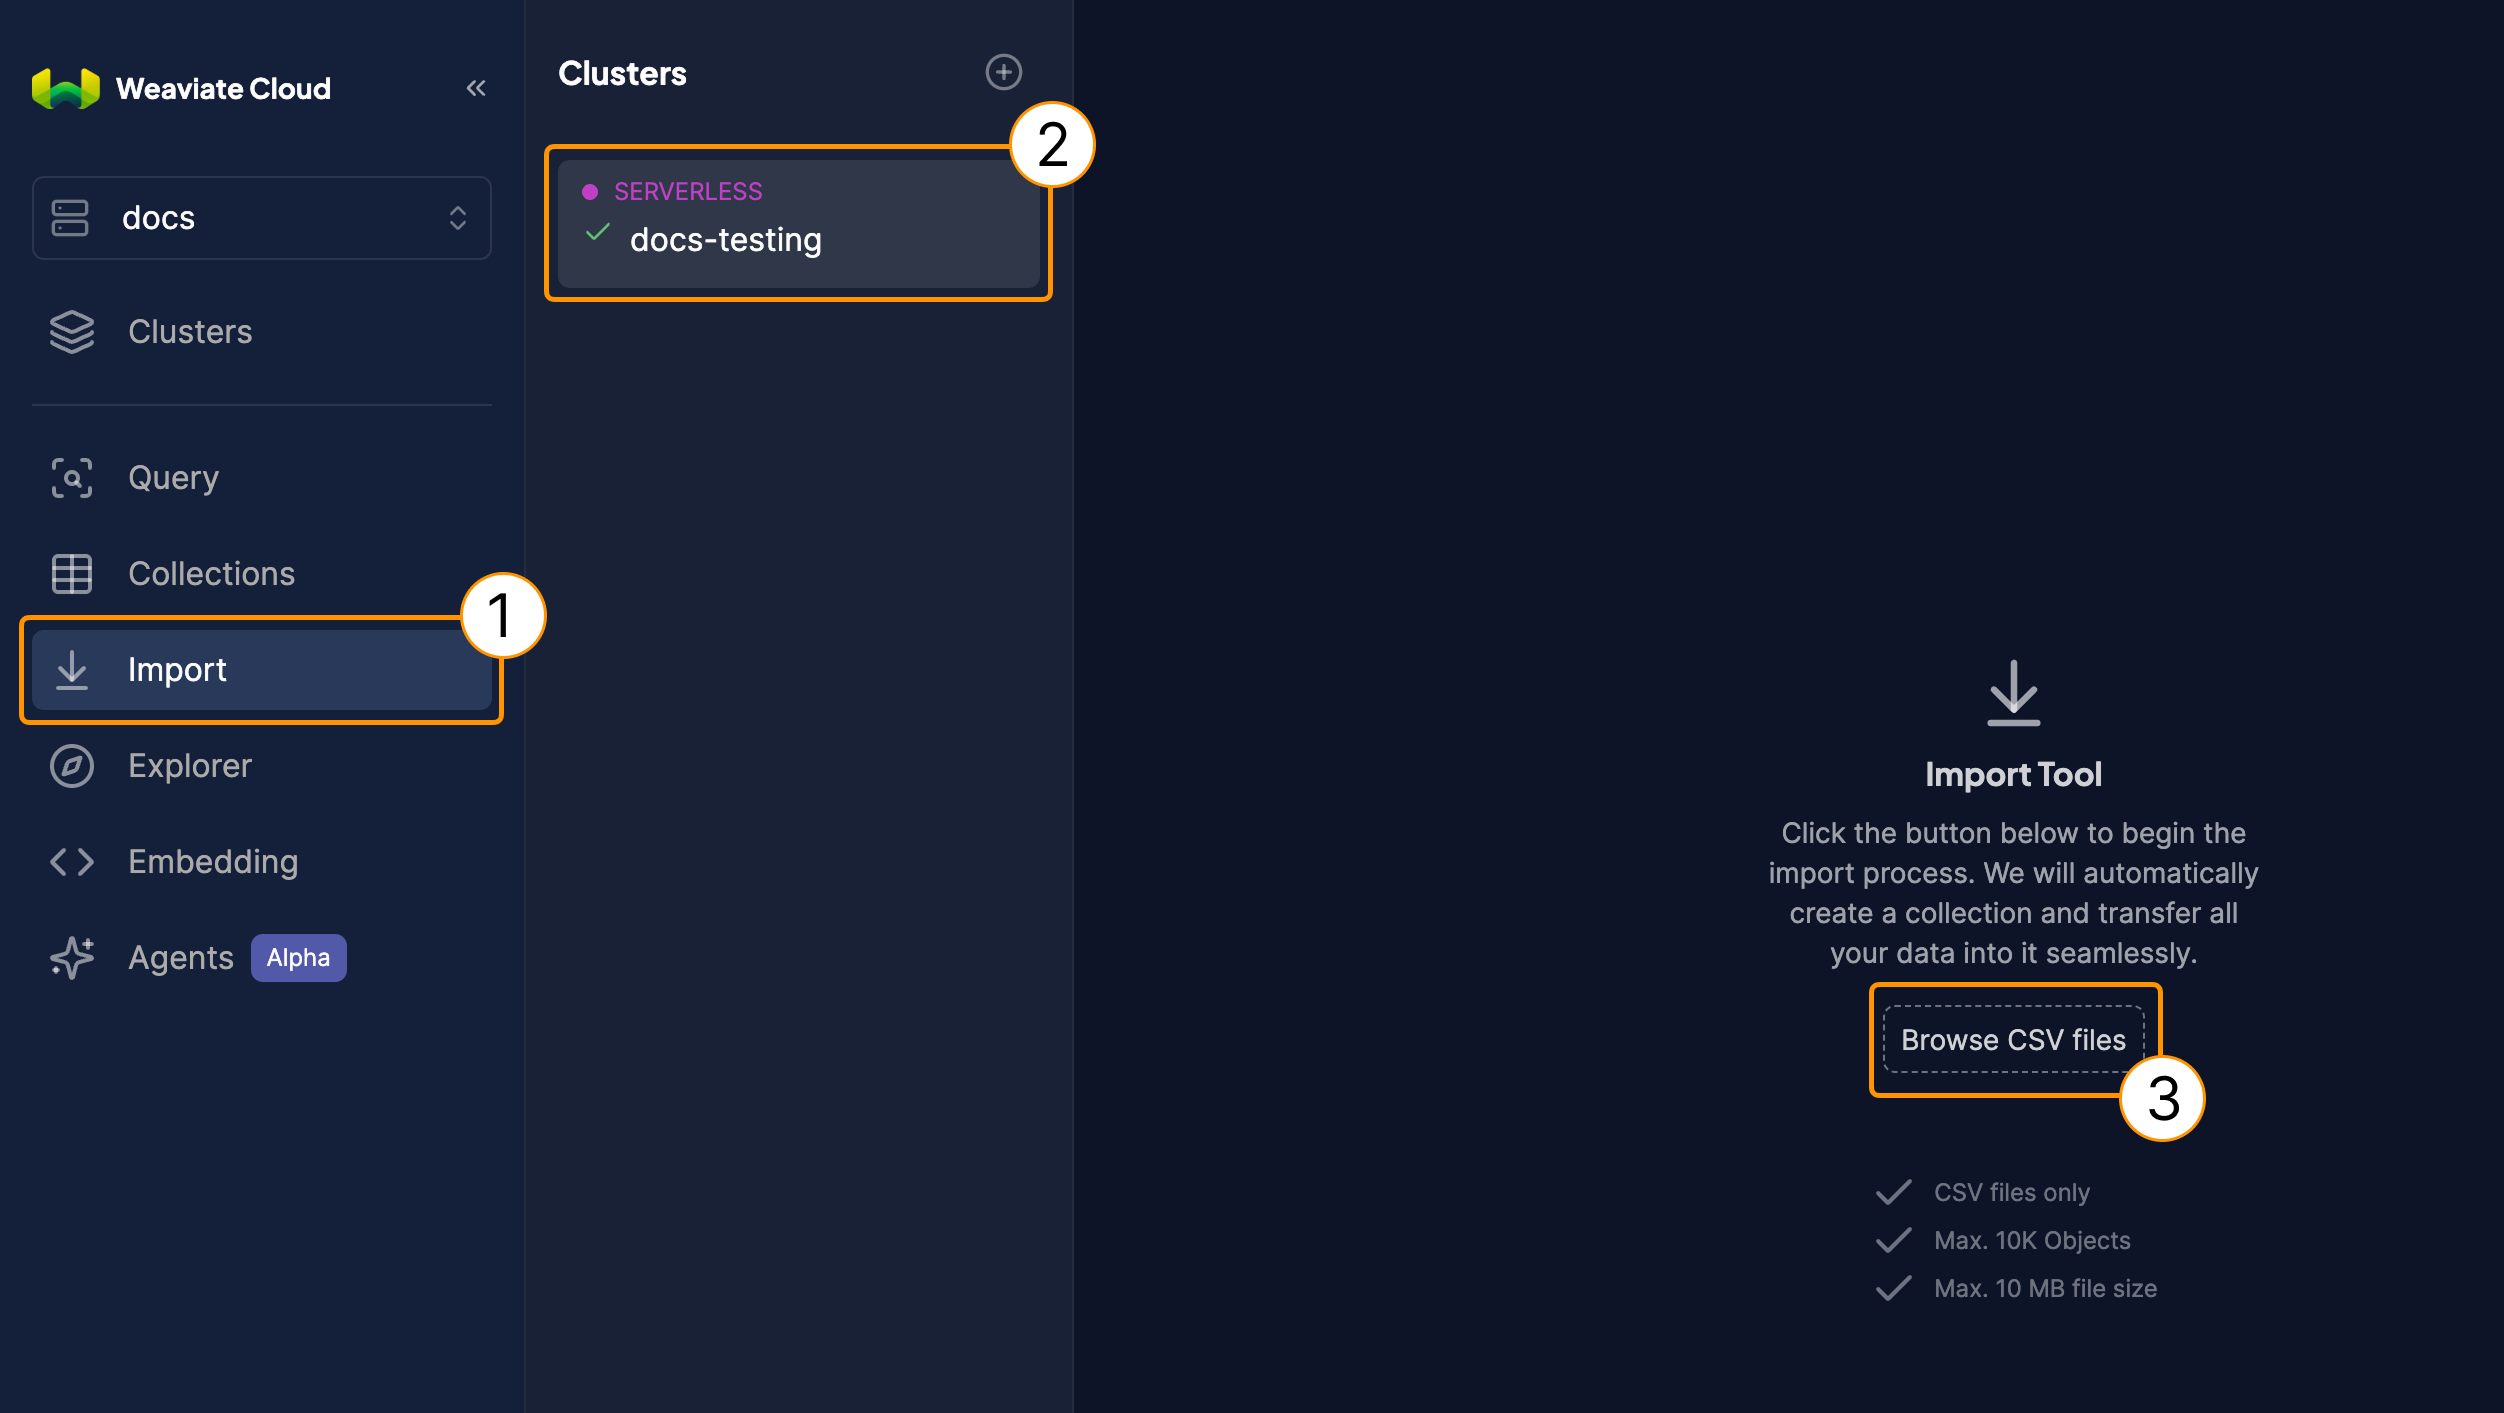
Start the import process in Weaviate Cloud.
After selecting your CSV file, the tool will display the file name and size.
- Verify that the correct file is shown. Click the
Nextbutton (1) to proceed to collection settings. If you selected the wrong file, you can click the redxicon to remove it and select a different one.
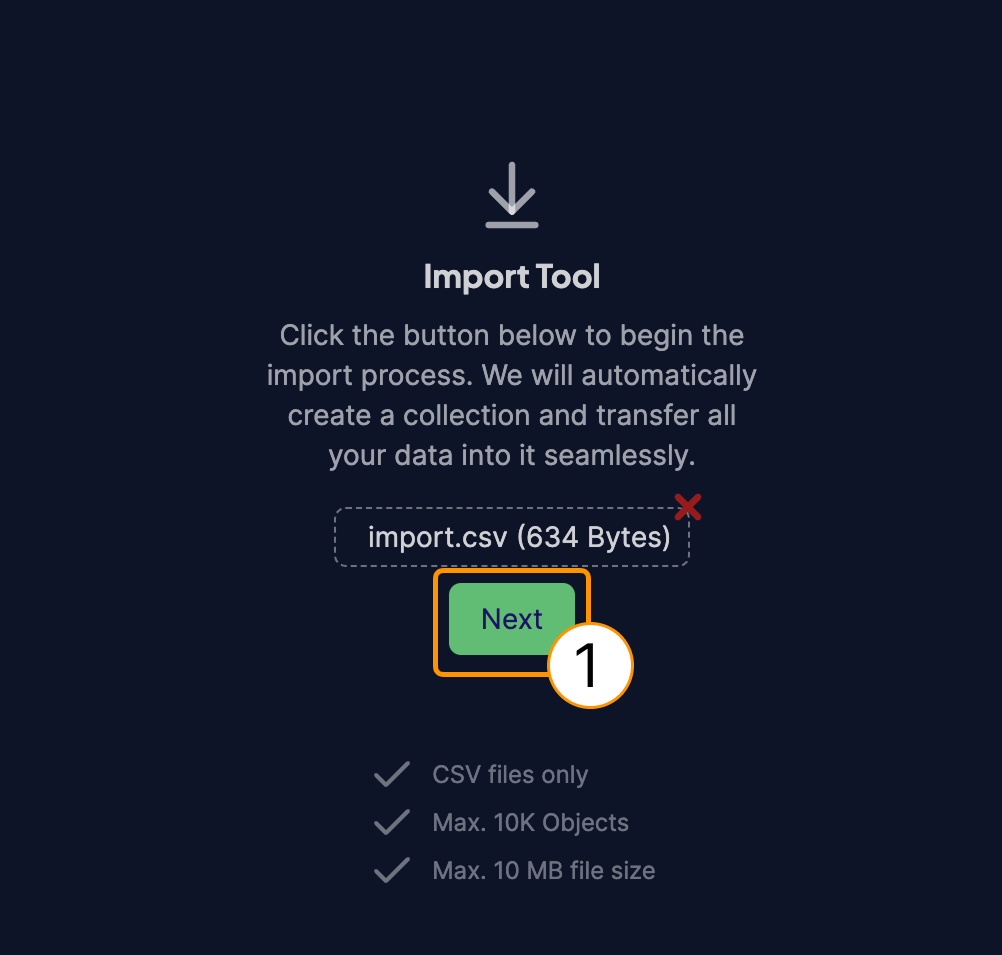
Confirm the CSV file to proceed with the import.
Step 2: Collection settings
In this step, you will define the settings for the new collection that will be created to store your imported data.
- Enter a name for your new collection (1). For example,
Product. The collection name must begin with a capital letter and can only contain letters, numbers, and the underscore character. Spaces are not allowed. - Configure other collection settings as needed, such as multi-tenancy, vectorizer, model, dimensions, base URL, and whether to vectorize the collection name. For this example, we will use the default settings.
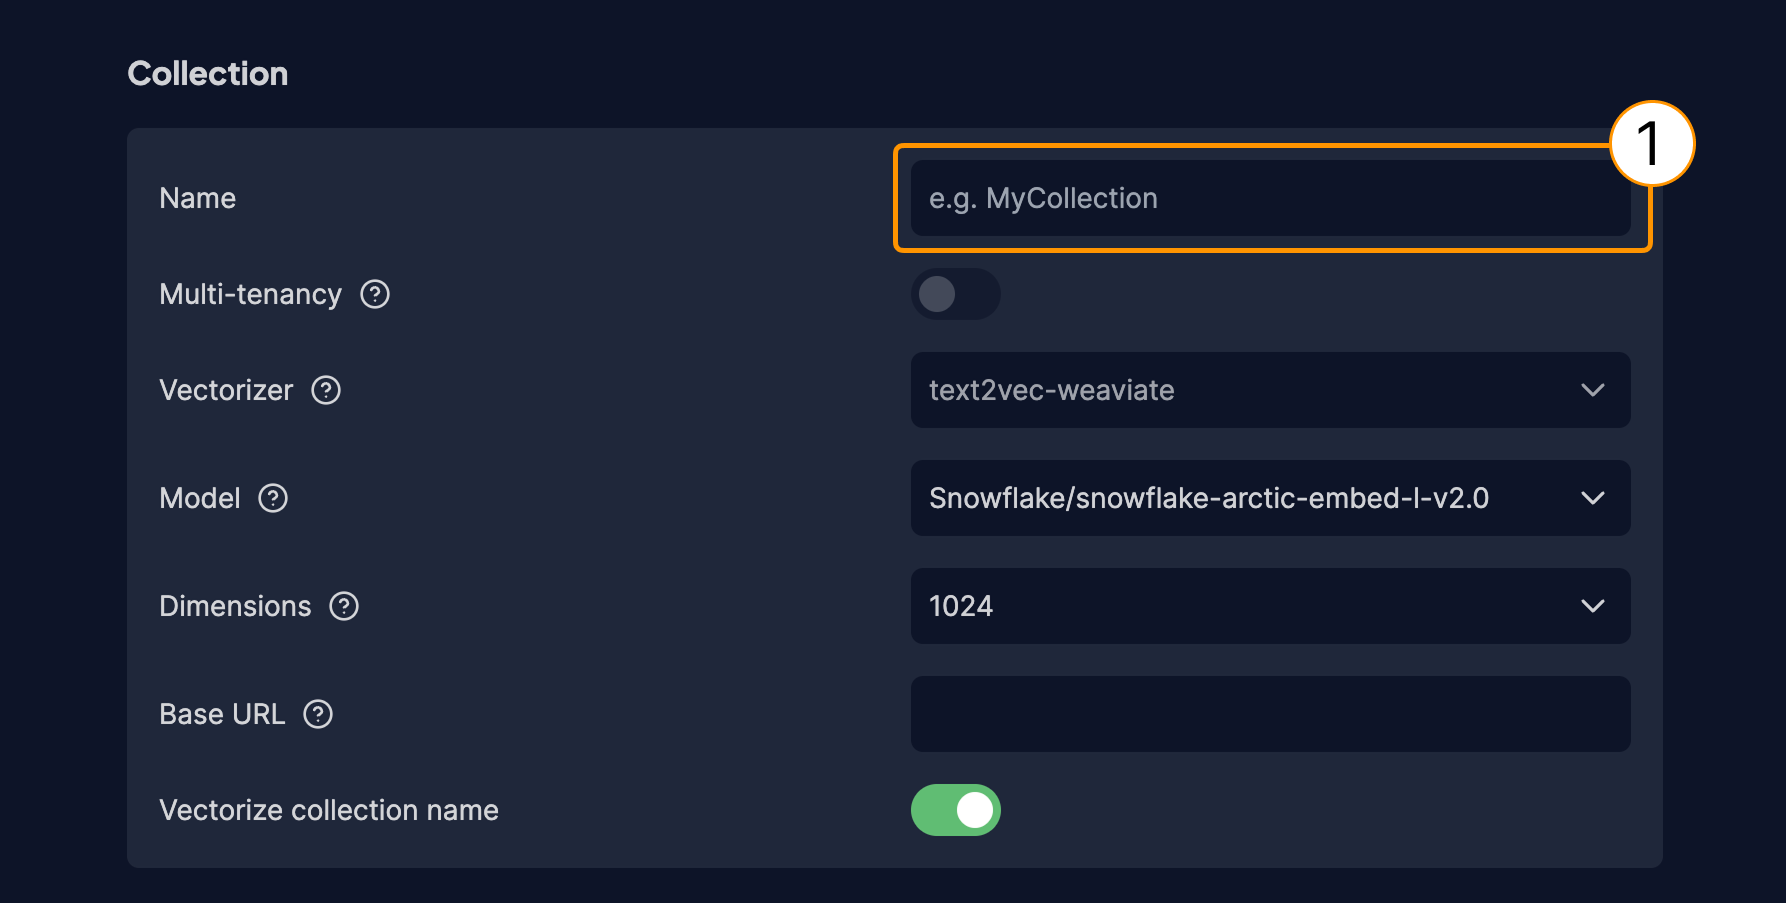
Configure the new collection's settings.
Step 3: Map properties
This is the final step before the import begins. Here, you will map the columns from your CSV file to the properties in your new Weaviate collection.
- The tool will display the columns detected in your CSV file (1).
- For each column, you can specify the
Property Nameas it should appear in your Weaviate collection (2). Property names must begin with a lowercase letter and can only contain letters, numbers, and the underscore character. - Select the appropriate
Property Typefor each column from the dropdown menu (3). For ourimport.csv:idshould beIntproduct_nameshould beTextpriceshould beNumberdescriptionshould beText
- Use the toggle switch to determine whether each property should be vectorized (4). For text fields you intend to search semantically, ensure this is enabled.
- If you need to remove a property from being imported, click the trashcan icon next to it (5).
- Once you are satisfied with the property mapping, click the
Submitbutton (6) to start the import process. The tool will create the collection and import the data.
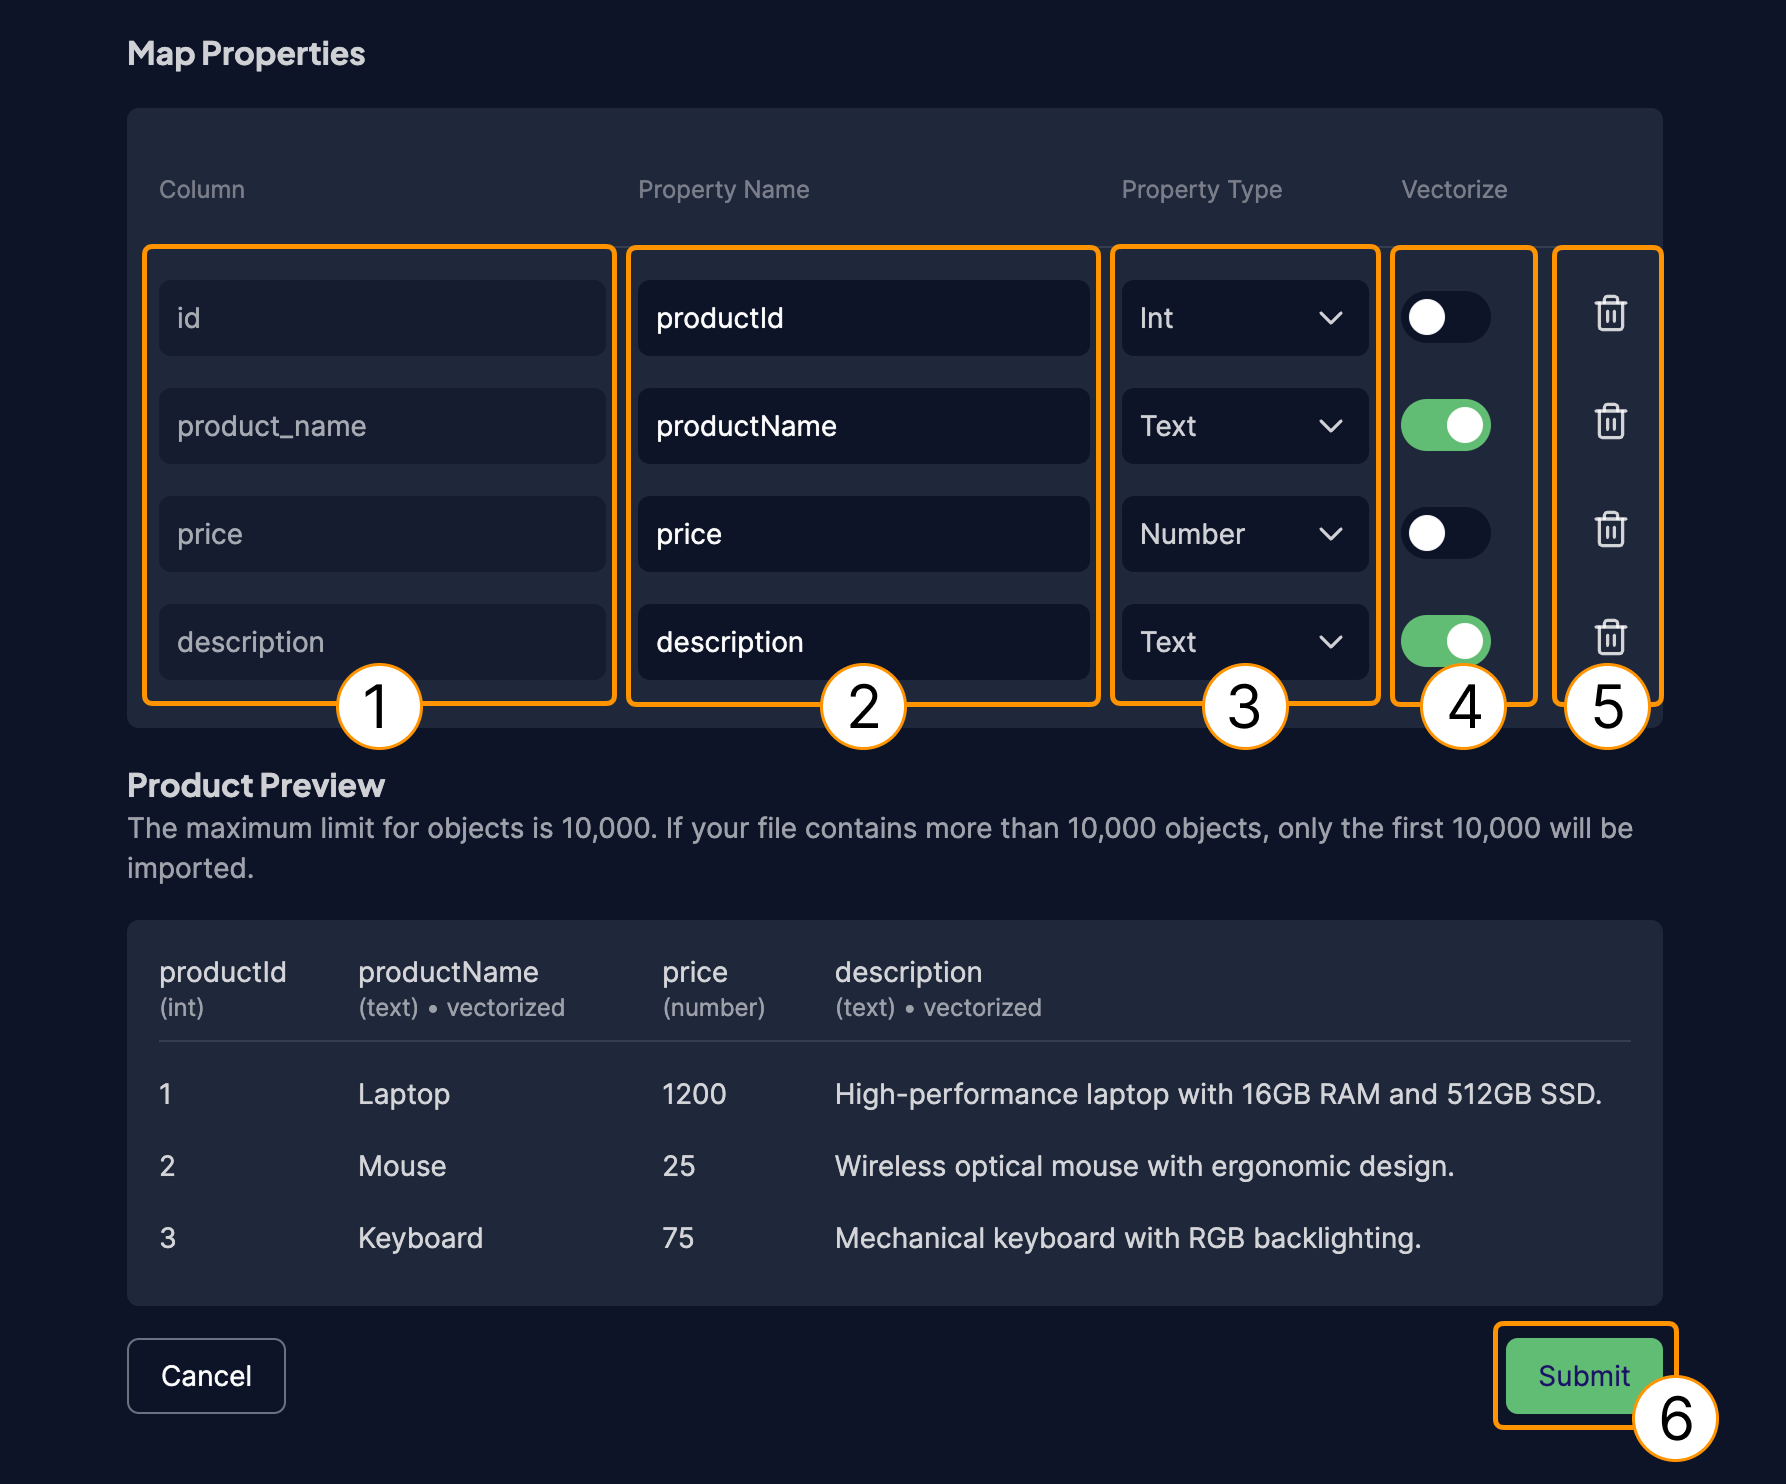
Map CSV columns to collection properties and start the import.
A Product Preview section at the bottom shows how your data will be mapped. Review this to ensure everything is correct.
Step 4: Verify imported data
After the import is complete, the Explorer tool should automatically open to view the newly created collection and its objects.
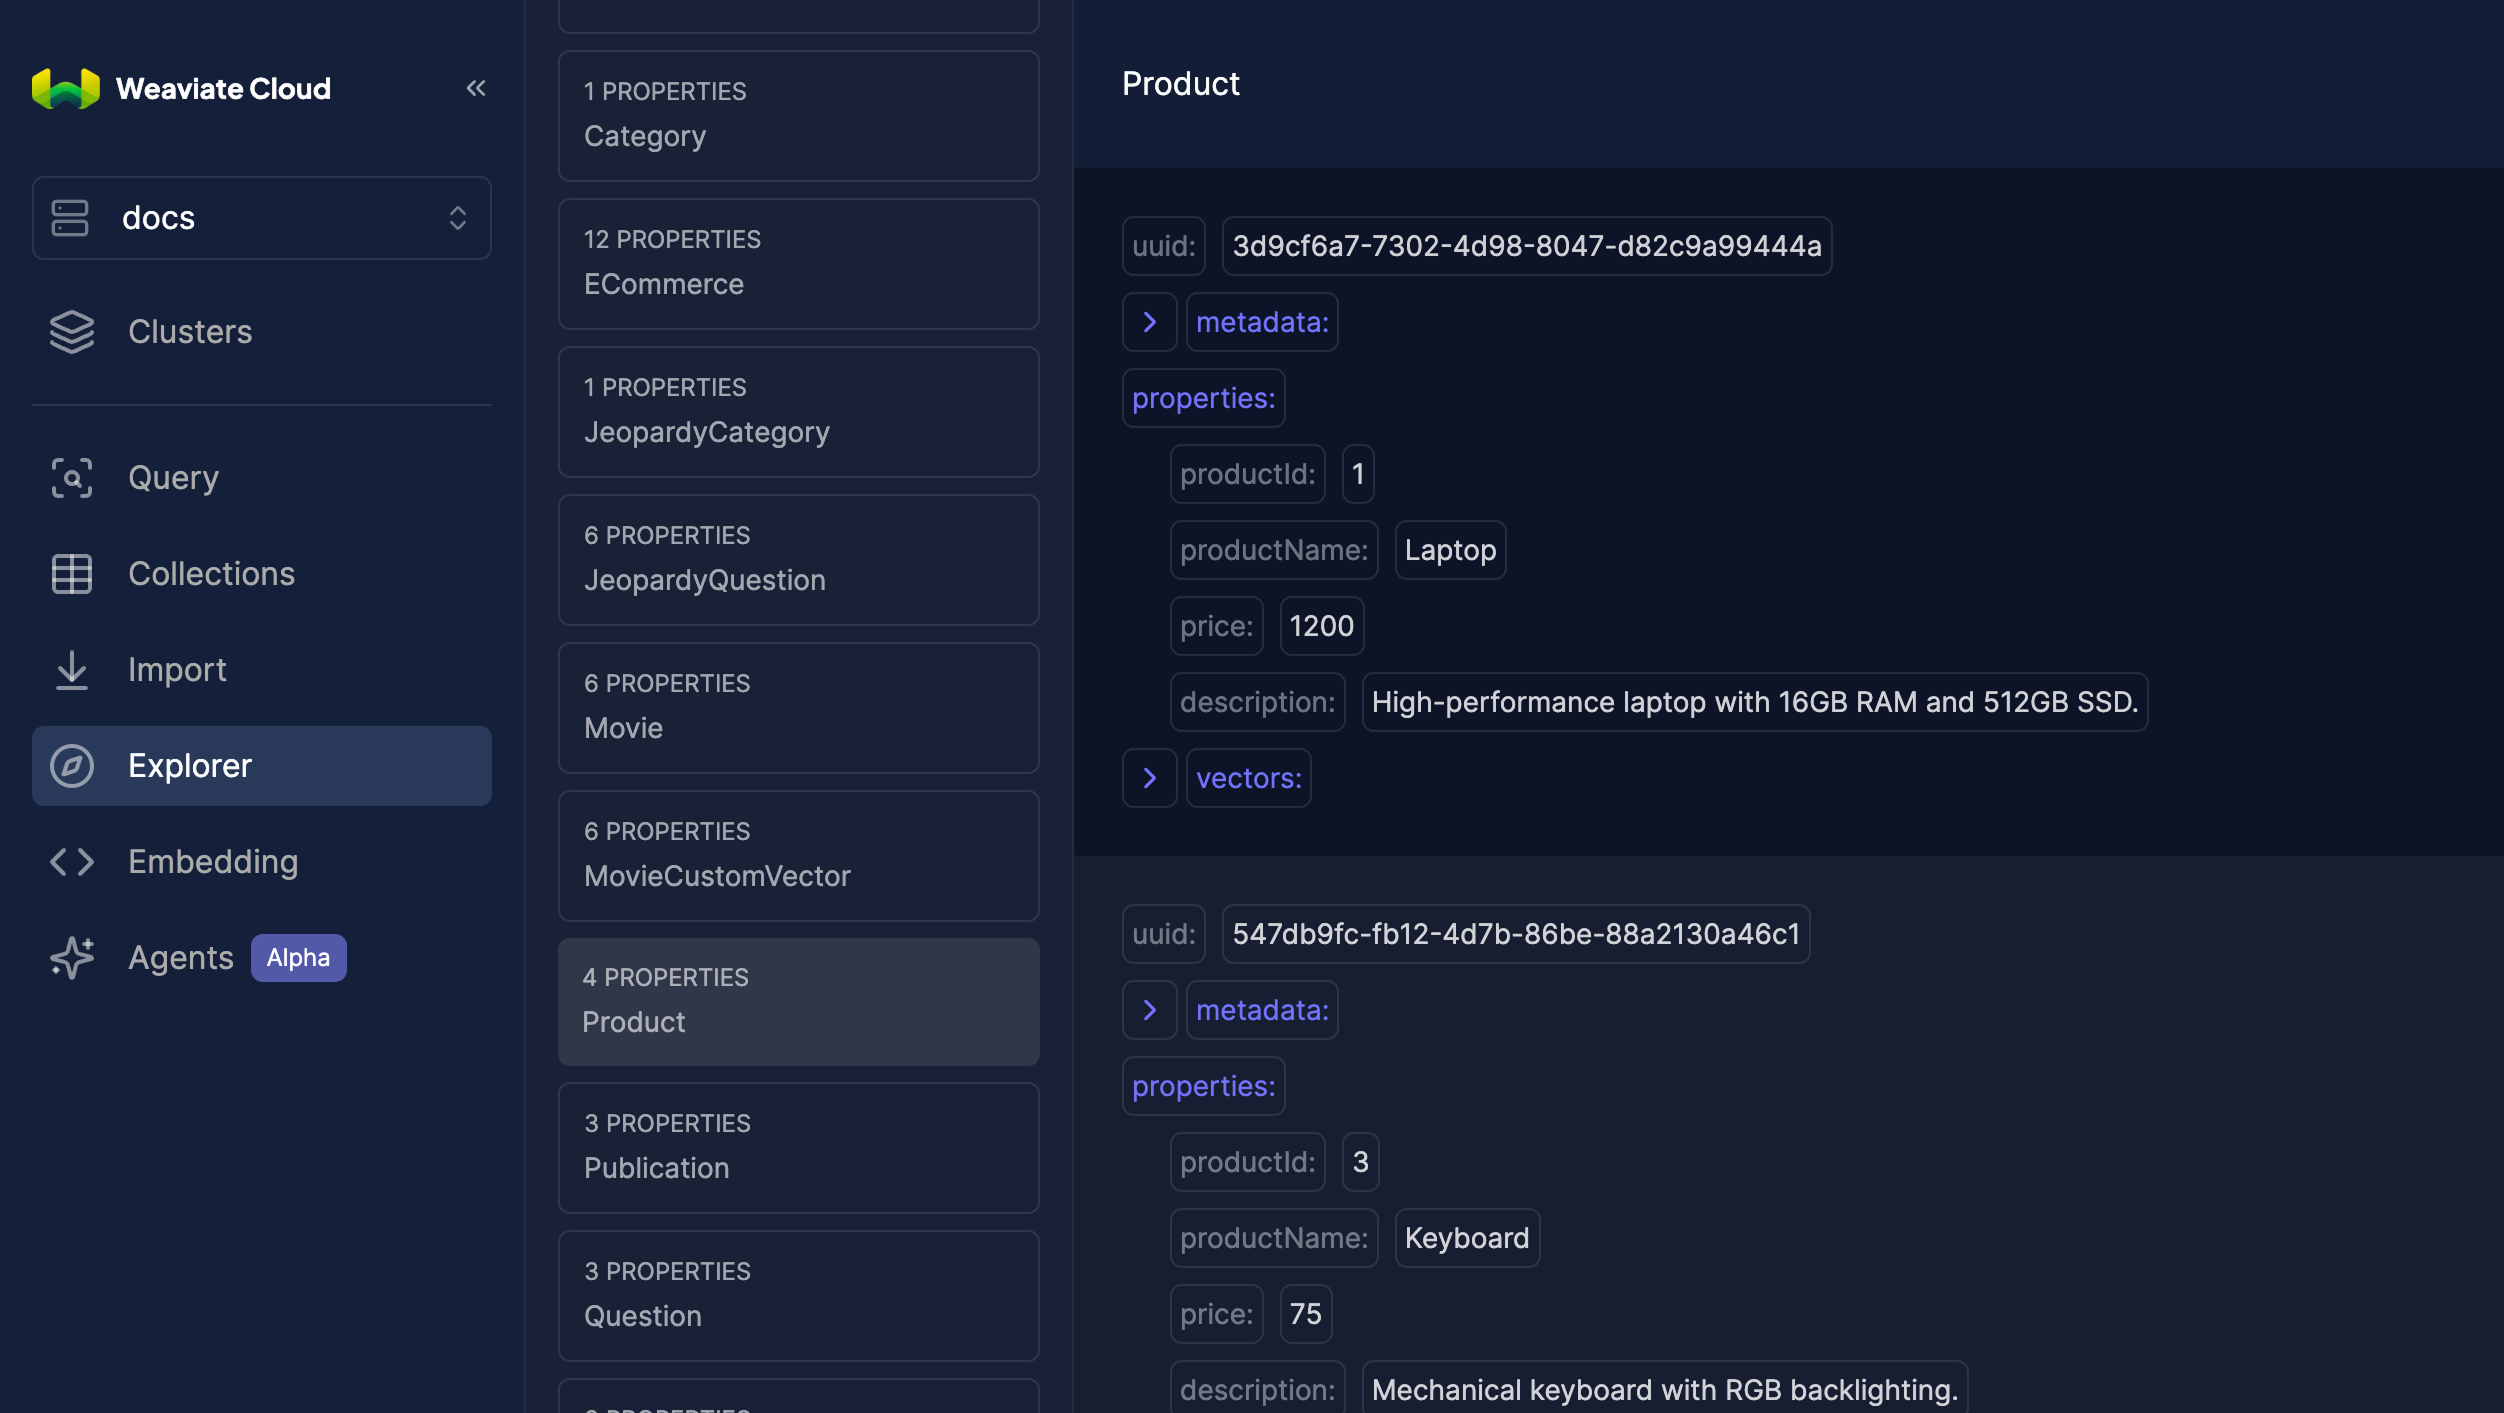
Verify the imported data using the Explorer tool.
You should see the imported objects listed, matching the data from your CSV file. You can expand each object to inspect its properties, metadata, and vectors.
Further resources
Support
For help with Serverless Cloud, Enterprise Cloud, and Bring Your Own Cloud accounts, contact Weaviate support directly to open a support ticket.
For questions and support from the Weaviate community, try these resources:
To add a support plan, contact Weaviate sales.